
DIY Hair Feather Installation

DIY FEATHER HAIR EXTENSIONS
Your feather look.
Your way.
Choose your colors and add them at home with our DIY installation tools.
Shop Feathers + DIY ToolsSee how installation works →Make the look your own
Start with a coordinated set or pick individual colors. Add the tools you need for installation.
Ready-made color sets
Designer combinations in 6- and 16-piece options make choosing your colors easy.
Shop designer feather sets →Single hair feathers
A subtle accent or a bold combination—choose individual colors to suit your style.
Choose your feather colors →DIY installation kit
Silicone-lined beads, a pink loop tool and printed instructions. Feathers and pliers are purchased separately.
Shop the DIY kit →
Your DIY starting point
The kit brings the installation essentials together:
- Silicone-lined micro link beads
- Pink loop / pulling tool
- Printed installation instructions
Feathers and pliers are not included. Have small jewelry or needle-nose pliers ready. A comb, clips and a mirror help with placement.
Get the DIY kit
See how it comes together
Micro links hold the feather and a small section of hair inside a bead. Follow your kit’s instructions, and open a step below for a quick overview.
1. Choose your placement
Lift the top layer of hair with a clip. Place the attachment underneath so it stays discreet.
2. Load the bead
Slide a silicone-lined micro link bead onto your loop tool. Choose a bead shade close to your hair color.
3. Thread the hair
Select a small section of hair, put it through the loop and pull it through the bead. Leave enough room for comfortable movement.
4. Insert your feather
Insert the feather’s narrow tip into the same bead alongside the hair. Point it in the direction your hair falls.
5. Close the bead
Use small pliers to gently close the bead. Check that the feather stays in place and the attachment feels comfortable.
6. Blend and style
Release the clipped hair and blend the feather into your layers. Keep the bead covered by the top layer.
Your attachment should feel comfortable. Reopen and adjust a bead that pulls or feels tight, or ask your stylist for help.
Wear it. Care for it. Make it yours again.
Everyday care
Wash and condition as usual. Brush gently near the attachment and avoid tugging or snagging. Follow your feather care instructions.
Read installation and care tips →Remove or reposition
Gently reopen the flattened bead with pliers by squeezing in the opposite direction. Once open, slide the feather and bead off. Never pull on a closed bead.
Check the feather before reuse and replace worn beads.
Refresh your supplies
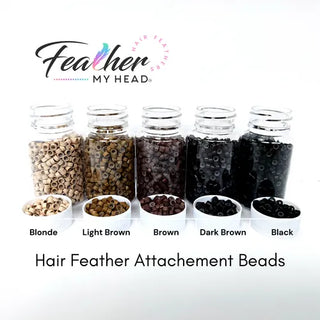
Match your bead shade to your hair at the attachment point.
Shop extra attachment beads →A few things to know
Does the kit include feathers or pliers?
No. It includes silicone-lined micro link beads, a pink loop tool and printed instructions. Choose your feathers separately and have small pliers ready.
Which feathers should I start with?
A coordinated 6-piece designer set is an easy way to choose a color mix. Single feathers let you select each color yourself. Check each product for its available lengths and quantities.
Do I need glue?
No. Micro links hold the hair and feather together inside a bead that is closed with pliers.
Can a stylist help me install them?
Yes. Ask your stylist about micro link installation, removal or repositioning. Take your feathers and supplies with you.
Which colors feel like you?
Explore designer sets, rainbow feathers and individual colors.
Find your feather look


